There are lots of ways to do procedural dungeon generation. I came up with a way that will allow for both really chaotic room designs and fully formed, hand crafted rooms. It’s based on joining smaller patterns together to form the room’s interior. In this post, I’ll do my best to explain what’s going on.
Setup: Defining Patterns
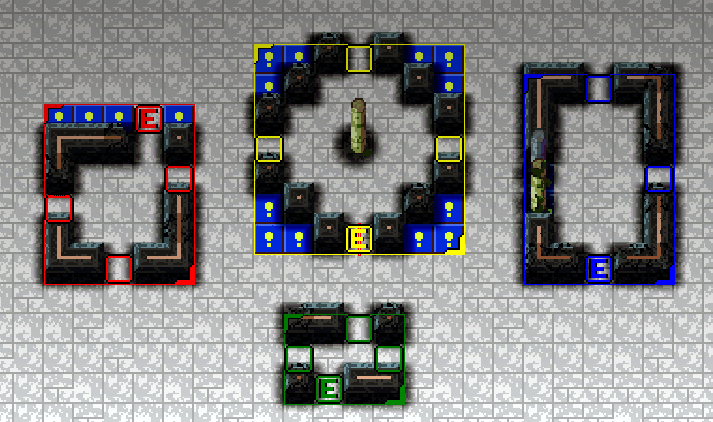
I use the editor to make this room, which contains four basic structures, the patterns. Everything is composed of simple tiles like walls, columns, floor, and water. Metadata in the room file marks specific tiles to define the pattern area (colored box enclosing the pattern) and two special types of tiles: the inlink and outlink positions. Each pattern has one inlink, shown with an E (for entrance), and one or more outlinks (empty colored squares). These are used to join patterns logically, which I’ll explain later.
For now, let’s walk through each step of the layout algorithm.
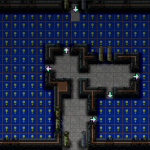
1. Create an Empty, Enclosed Room
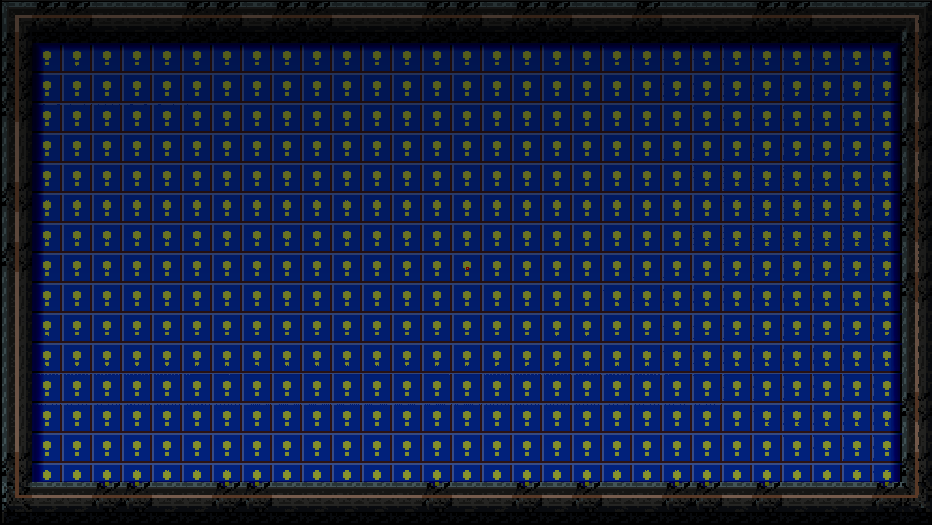
Rooms can be any size–I’m using 31×17 as the default size for now. Each room is enclosed by the basic wall tile. (Walls are automatically blended to their neighbors in a separate algorithm.)
2. Place doorways at the door positions.
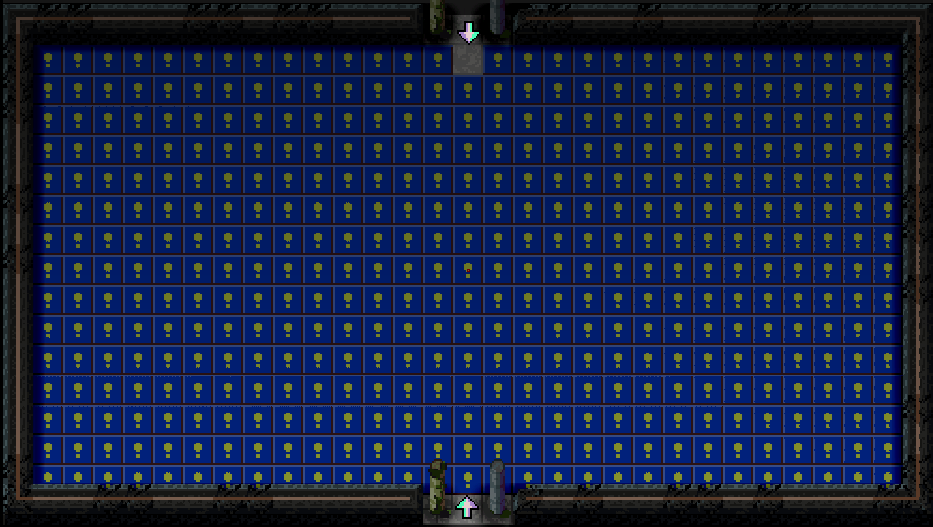
Each room has one entrance, and optionally has exits on the three other walls. In this room, we have the entrance at the bottom center, and a single exit at the top center. Some decorative side pillars are added for some ambience.
The arrows are special. An arrow on a tile means that tile is a boundary tile and can be joined to other patterns. The engine knows to start at the bottom arrow, because that’s the entrance door, and that’s where layout begins. The bottom arrow is actually treated as a pattern outlink (explained next).
3. Find a Pattern from the Collection
A pool of pattern candidates is created from the four patterns we defined in the editor earlier. It automatically makes variants that are flipped and rotated in various ways for the ultimate in variety and versatility.
To select a pattern, it goes through each one and tests it against the room’s outlink positions (currently just one, at the entrance door). It checks if the pattern will have all of its floor tiles contained within the room and not intersecting with existing walls or water. Once it has the list of candidates, it randomly selects one, and the layout engine applies it to the room.
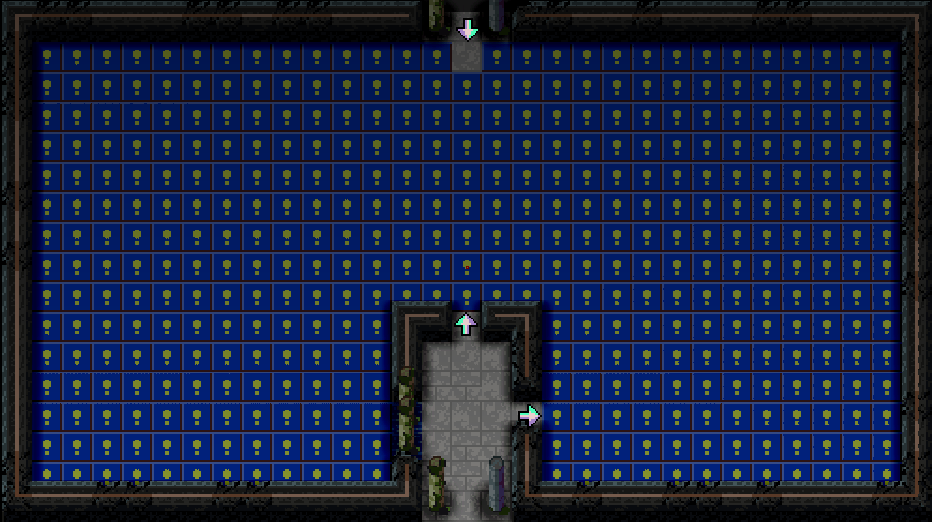
After the pattern is applied, it clears the outlink marker that was used, so it doesn’t get tested in the next iteration. Instead, we have two exciting new outlinks, provided by the pattern: up and to the right.
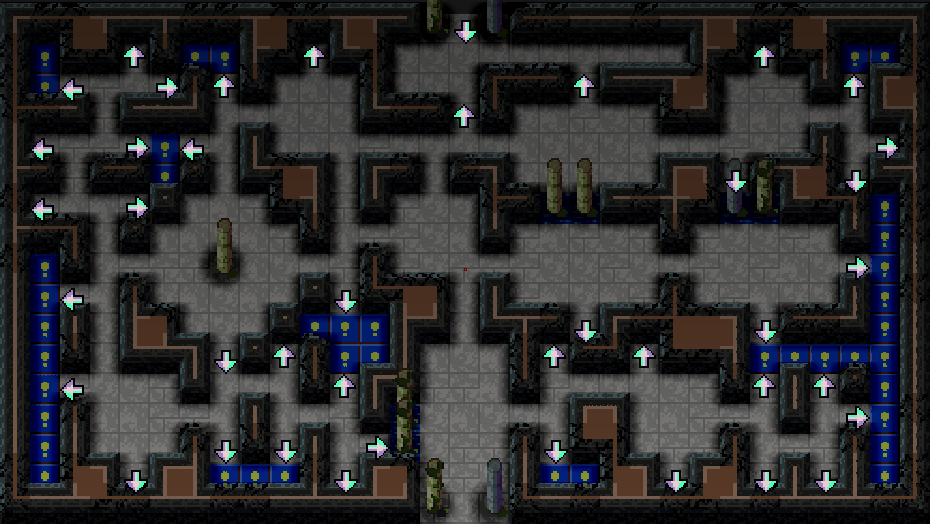
4. Repeat step 3
…over and over, until nothing else fits.

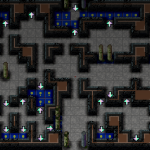
5. Ensure a path to the exits
We only have one exit to worry about in this room, so it’s only done once. It essentially does a Photoshop-style “flood fill” of floor tiles starting at the exit’s doorstep position:
This isn’t always necessary, because sometimes the layout engine conveniently places a pattern that enables passage to the exit. The engine will never place a wall blocking the exit, because of the “reserved” doorstep position we added at the beginning.
6. Trim Dead Ends
Anyone who’s played Soulcaster knows how deadly nooks and crannies can be. If you get chased in there, you’re going to have a hard time getting out. So in an act of charity, I turn the unused outlinks (the ones not pointing to floor tiles) into walls.
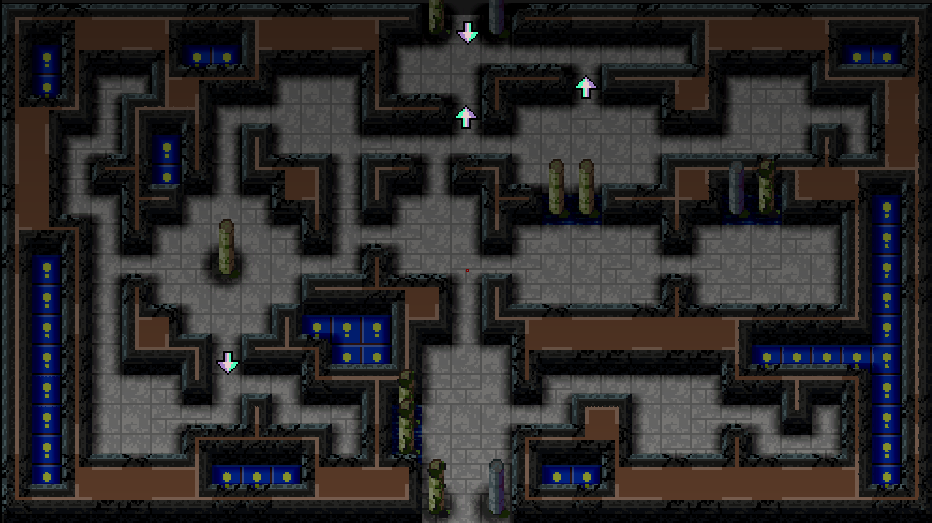
Notice it doesn’t get rid of all the dead ends, just the ones created by the dangling pattern links. If I wanted to be truly kind I could have it fully zap the dead ends and ensure circular passages everywhere. But that’s a task for another day.
7. The Finishing Touch
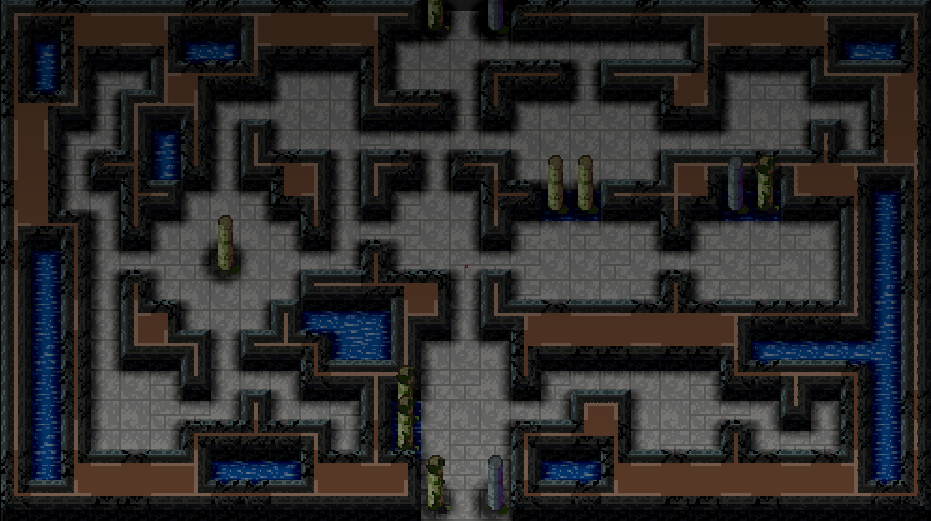
Leftover tiles are transformed into pretty water. Aesthetics.
So that’s basically it! I’m aware that while this type of chaotic level layout may be interesting, it’s not as cool as having a more pre-planned layout like the old school Soulcasters had. I liked to put concentric circles like walls and moats, have islands with bridges, or an enclosure surrounded by trees that you needed to infiltrate. That stuff’s all coming: the cool thing about this pattern system is that I can define patterns of any size, tag them for special purposes, and link them together however. A pattern could be an entire castle 40×40 tiles in size. It could even leave interior rooms vacant and link into them, populating them as needed.
Spawner placement is the next challenge, something I’ll be tackling this week.
Thanks for reading–and comment if you liked this post and want more of this sort of thing (or if you want to hear about something in particular).